How To Cut & Fit Fuselage Tubes
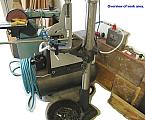
Here's the basic procedure I used to cut and fit tubes while building my fuselage. Below you can see how I assembled a tubing joint for the battery tray of my fuselage. This project was one of the last ones that involved tubing, and since I'd already built the rest of my fuselage, my technique was about as good as it was going to get. Keep in mind that the methods I present here are what worked well for me, and there are many different ways to accomplish the same result. Also see the Tools Used page to find out more about the tools shown below.


| Action | Pictures | |
| Start out by making a nice FLAT table that is long enough for the fuselage to be built on. Then draw a perfectly straight line down the middle of it to be used as a reference centerline. You can go through my build log to find out how I built my table, leveled it, and drew a straight centerline on it. Look Here and Here. | ||
| First comes the layout of the structure on the table. Draw the tube centerlines only with a nice sharp pencil. Use the table centerline as a constant reference, not the table sides which are probably out of square. If you cannot remember how to draw a line perpendicular to the centerline using a compass, ask any 6th grader. | ||
| Use the the proper size Master Blocks to locate and install Screw Blocks which will hold tubes in position. Don't put blocks too close to joints, you need access for tack welding. | 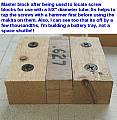 |
|
| Figure out what shims to put
under the tubes to keep the tube centerlines .625 above the table. Or
cheat by using this formula: Shim Thickness = .625 - (Tube Dia. / 2). So for our example here, I'll be using 5/16" shims on the 5/8" tubes. |
||
| Cut some tubing to rough length, don't try to be precise here, a little extra is better than too short later. | 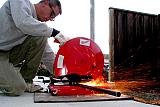 |
|
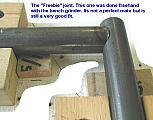
| Lay some tubes in the blocks, and figure out
how to proceed, what joints to do first. Try to think several steps ahead
through in your head first, hopefully you'll come across a good way of
doing it, and make less mistakes. Don't worry, mistakes only cost time
& money. In this example, I've decided to fit the vertical tube first.
It was a scrap piece, that already had a joint cut on one end. A little
work with it in the bench grinder got it to fit at one end. (Note: My
bench grinder has flat wheel faces, I do not round the faces for tube
work.) I call this the freebie end, since no measuring is required before
cutting a fit into it. Now we will proceed to mark, cut and fit the upper end so it mates with the upper horizontal tube. |
 |
 |
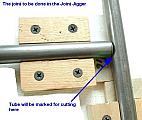
| Put the tubes together such that a tube
butts right up against the tube to be cut as shown, then use something
thin and sharp to make a Scratch Mark, which shows where to cut. I always mark the "short" side of the cut, since marking the long would assume that the holesaw cuts exactly the diameter that is shown on its side. They don't. They all cut a little big. When marking the short side it doesn't matter. I once made a cut with a 3/4" holesaw that should have been done with a 5/8" holesaw. I was still able to use the tube, I only had a very slight gap to weld over that occured in two spots. The tube still fit tight in the joint. |
 |
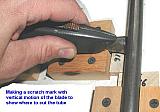 |
| Here's what the scratch mark looks like. Also, the second picture shows how an acute angle would be marked. Sometimes I have to draw an extended centerline through the joint and put blocks in on the other side so I can still mark on the short side of the cut. |
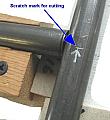 |
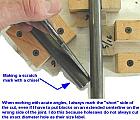 |
| Put the correct size of holesaw in the Joint
Jigger and set the angle. To do so, I use the Sliding T-Bevel to record
the angle and then transfer it to the Joint Jigger. Since I have flipped my Joint Jigger tubing clamp over, the bolt holes don't line up anymore. I make sure to use two, sometimes three "C" clamps to secure the black tubing clamp to the silver base before cutting. |
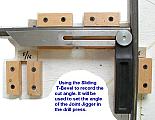 |
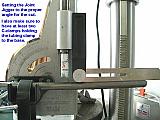 |
| The second picture shows how to setup for
doing an acute angle. I keep my Joint Jigger tubing clamp flipped around
so I can always cut the acute side of angles. It is more accurate, and the
coolant doesn't run inside the tube either. Note that after setting the angle, the bearing block would be slid down to be as close to the tube as possible. For extreme acute angles, I ran the bearing block so low that I could only use one bolt to hold it. I also used a lot of clamps too, and obviously I cut real slow then. I suggest drilling another hole below the slots, or cutting an additional slot below the others to allow for two bolts to hold the bearing block when cutting more acute angles. |
 |
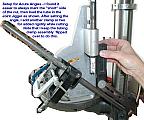 |
| Next, trim the end of the tube beyond the
Scratch Mark so the holesaw won't cut on its "backside." Cutting on the backside is hard on the saw, because unsupported tubing can catch a tooth. Also it only adds to the material removed by the saw. When cutting very acute angles, its hard to know where to trim the tube to avoid backside cutting, so I'll start the cut, and then stop the drill press just before the saw makes contact on the backside. Then I'll trim the tube away, and contine cutting with the joint jigger. |
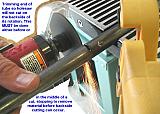 |
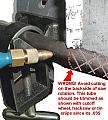 |
| Position the tube in the Joint Jigger. Rotate the holesaw to find the tooth farthest out from center and set the tube in so that tooth just takes out the mark. Also be sure to adjust the tube so the cuts will be parallel (or at the desired other angle). | 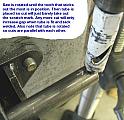 |
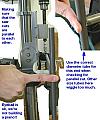 |
| Do a little test cut to make sure you're not
cutting too much or too little. Cutting a hair too much is ok, since the
resulting loose joint fit may be welded up. Remember the better the fit,
the easier the weld. Try to be accurate. If the cut is going to be ok, then get the mist sprayer going. You want to keep the holesaw teeth cool and slightly wet, since water absorbs the heat too. To little spray and the saws dull or break, too much and it makes a little mess. Mess is better. |
 |
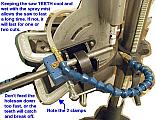 |
| Turn on the drill press at the slowest
possible speed and start cutting. Don't feed the saw too fast, or the
teeth will catch and break off, as shown in the right side picture. Saw is
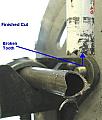
still usable, but at reduced feed rates. To repeat, on acute angles, I make half a cut, THEN stop just as the holesaw starts to cut on the backside. I then use the cutoff tool to trim the backside of the tube off, so the holesaw can proceed. Otherwise its too hard to judge where to trim before starting the cut. I've also found left and right handed tin snips handy for this when cutting .035 tubes. Sorry I wish I had a picture of this. |
 |
 |
| Here's what the finished joint looks like after cleaning it up with the bench grinder. | 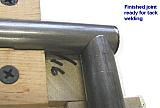 |
 |
| Now if I had to put a tube into a cluster
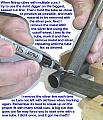
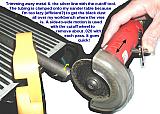
here's how I would do it: First use the Joint Jigger to make one cut and mate the tube to one of the tubes in the joint. Try for the biggest tube in the cluster. Then use the cutoff tool to remove metal so it clears the other tubes in the joint. Do so by test fitting, marking with the silver pencil, and removing metal AND silver. Reapeat as needed. The inner fuselage diagonals are ones where the joint jigger is useless. Since they go in last, you'll be an expert at the fit-mark-grind routine. These tubes are fit entirely by hand. Its not hard, it just takes time and maybe some extra tube. Don't worry, you can use the mistake tubes for something else, like your battery tray! |
 |
 |
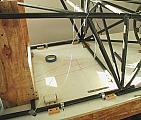
| These next pictures show how I
fit tubes in space, as opposed to fitting tubes on the table. First I put
a silver dot at the outside C/L of each longeron at the intersection
of where the tubes are supposed to go. Tape a string taught between
the longerons over the 2 dots. >Note that I didn't think to take pictures for a detailed tutorial when I was building, but was able to build this example for you from pictures I did take during construction. Thats why the tube sizes and angles don't necessarily match in these pictures. |
 |
|
| Use a sliding T-bevel & the string to get the angle of the bottom joint, and set the JJ (Joint Jigger) to that angle. Cuta length of tube to the rough length, then using the joint jigger,cutthe freebie end to the correct angle. | ||
| Next, set the angle for the top joint using the sliding T-bevel and the string again. | 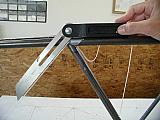 |
|
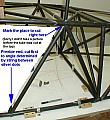
| Set the tube into position as
well as possible and mark where to cut as shown below. To mark accurately
you have to get your eyeball down so you're looking parallel to the table
surface. Yes, there's some "wag" involved in this step, but
you'll be amazed how close you can get to cutting it to fit perfectly. Note that this picture shows the tube already cut and fit into position. Hopefully you can imagine laying it up there and marking it. |
 |
|
| Cut the top end of the tube in the JJ, making the holesaw cut right up to the mark. Test fit the tube and make final adjustments if needed with the cutoff tool. |  |
|

